In this tutorial you will learn how to make basic 3d effect using simple photoshop commands. It’s fake because there is no real 3d here. But you will get quite nice effect.
Step 1.
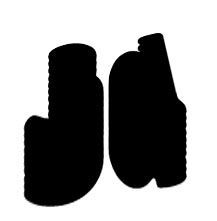
Create a new document, size 250 x 250 px. Use Text Tool, please try to choose some bold font, like Impact. Change foreground and background color to default by pressing “D” on keyboard. Change text size to 132px and type some text as shown on Image 1.

Image 1.
Step 2.
Try to visualy center text on image area. Right click on text layer and choose “Rasterize Type”. While your text layer is still selected press “CTRL + T” on your keyboard and rezise your text like shown on Image 2.

Image 2.
Step 3.
Now here is a bit tricky part to do. You still must have your rasterized text layer selected, start duplicating your text layer. You do duplicated if you hold right “ALT” on keyboard and left mouse click, and slowely drag your mouse down, to get duplicate of layer. You will have to make 9 duplicates of text layer to get decent 3d effect. Try to arrange the duplicated like shown on Image 3.

Image 3.
Step 4.
Now select all “copy” layers and merge them together, just don’t merge first original text layer. You can select all copy layers (if you have photoshop CS2) just by clicking on last layer and by holding “SHIFT” your can click on first layer, all other layers between will be selected too. If you have older versions of photoshop you will have to select them manually. When you select all copy layers you can merge them with pressing “CTRL + E” on keyboard. To get a better 3d effect you can now adjust size of layers vertically like shown on Image 4.

Image 4.
Step 5.
You can now move your default (first) text layer above those merged-copy text layer. Double click on your top text layer now, in layers pallete to go into Layers style menu. Select “Bevel and Emboss” and enter all options as shown on Image 5. You can also choose your own colors there for highlight and shadow mode of bevel effect…

Image 5.
Step 6.
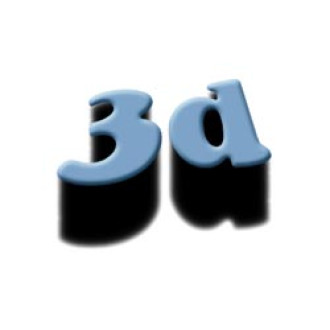
Now move to “Color Overlay”, select it and choose some nice color, we used light blue. Click OK. Hold “CTRL” and left click on thumbnail of your second layer (one that is merged and looks like 3d). You will get a selection around it. Now click on menu Select -> Feather. Choose feather radius of 2. Click OK. Click on menu Filter -> Blur -> Gaussian Blur. Under raduis enter 4. Click on menu Select -> Inverse (or “Shift + Ctrl + I) to inverse the selection. Press “Delete” key on your keyboard, twice. Press “Ctrl + D” to remove the selection.
Final result


 (2 votes, average: 3.50 out of 5)


