Did you ever wanted to put your text on fire? This tutorial will learn you how to fire up your text in Photoshop.
Step 1.
Create new document 250×250 pixels size. Press D and fill background with black color (press G or choose Paint Bucket Tool, and click on image white area). Type some text with Text Tool (shortcut is T on keyboard), I suggest you use Arial Black, or Impact font typeface, but if you are on Mac use some other bold font. Make the text size is 36pt and white color. Center the text layer on image. Your image now looks as displayed on Image 1.

Image 1.
Step 2.
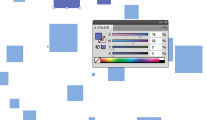
Create “color balance” Adjustment Layer. To do that, click on icon in Layers palette (shown on Image 2) and choose “Color Balance” Enter the settings in Color Balance as displayed on Image 3. You must enter setings for each level separately, so first enter for Highlights, then check Midtones and fill in, and then go with Shadows and fill them in.

Image 2.

Image 3.
Step 3.
Now right-click on your text layer and choose “Duplicate layer” Then, again right-click but on that duplicated Text layer (it has “copy” added to it’s name), and click on “Rasterize Type”. Your Layer Palette should look like on Image 4, just your text may be different.

Image 4.
Step 4.
Choose “Smudge Tool” (keyboard shortcut “R”), shown on Image 5, and change “Brush:” to “Spatter 39 pixels”, as shown on Image 6.

Image 5.

Image 6.
Step 5.
This is the tricky part, as you must put a little effort to do this. You must brush with smudge tool from center of letters to the way out, and do it a bit wave kind. So to make this effect look cool and much like fire, try to brush your moves as shown on Image 7. Do it letter by letter. If it’s a bit hard for you to do it, try a few times, and practice, after few shots you will got it.

Image 7.
Step 6.
To finalize your Fire Effect create another blank layer by clicking the icon in Layers palette as shown on Image 8.

Image 8.
Move that new layer on top of Color Balance layer.
Step 7.
Turn off original Text layer. You can also delete it. Now you see your effect. And just to finish it choose that blank layer you created, and choose Brush Tool (shortcut B). Choose some soft brush like shown on Image 9.

Image 9.
Step 8.
Set that top layers blending mode to Overlay and Opacity to 60%, as on Image 10.

Image 10.
Now brush over your text to get more highlights and to see your text more readable, when you are satisfied, you are done. You can also adjust Opacity of that top Overlayed layer, to satisfy your needs.
Final result

This is our final result.